How to use Swift Reviews

Five simple steps, with screenshots, from first login to your first new Google review.

Step 1

Set up your business details

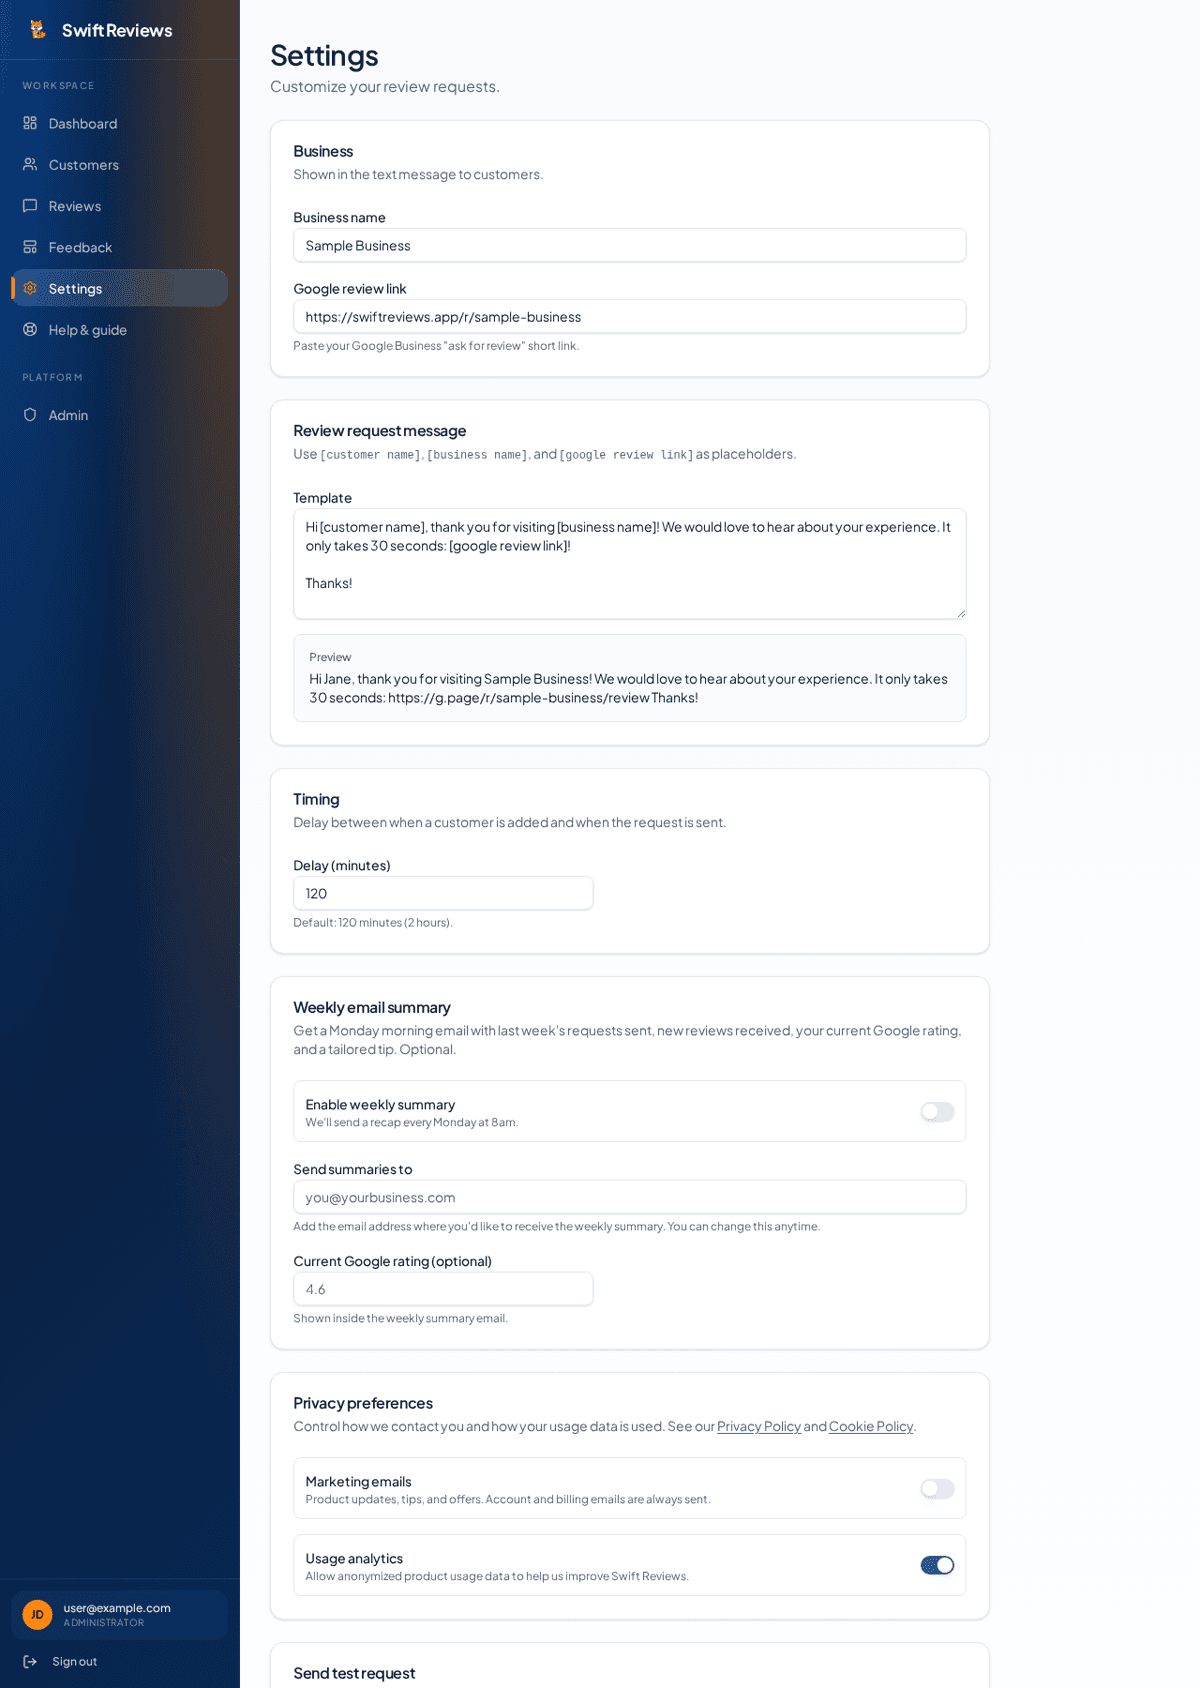
Open Settings from the left menu. Type your business name exactly as customers know it, then paste your Google review link (the short "ask for review" link from your Google Business Profile). This link is what customers tap to leave their review.

  • Business name appears inside every message you send.
  • Google review link is required before requests can go out.
  • Click Save when you're done.
Swift Reviews settings page showing business name, Google review link and message template fields

Step 2

Choose your message and timing

Still in Settings, edit the message template. Keep the three placeholders — [customer name], [business name] and [google review link] — and Swift Reviews fills them in automatically. The preview underneath shows exactly what your customer will read. Below that, set the delay: how long after adding a customer the request should send (2 hours by default).

  • Short and friendly works best — keep it under two sentences.
  • A 1–3 hour delay usually gets the best response.
Review request message template with live preview and delay timing settings

Step 3

Add your customers

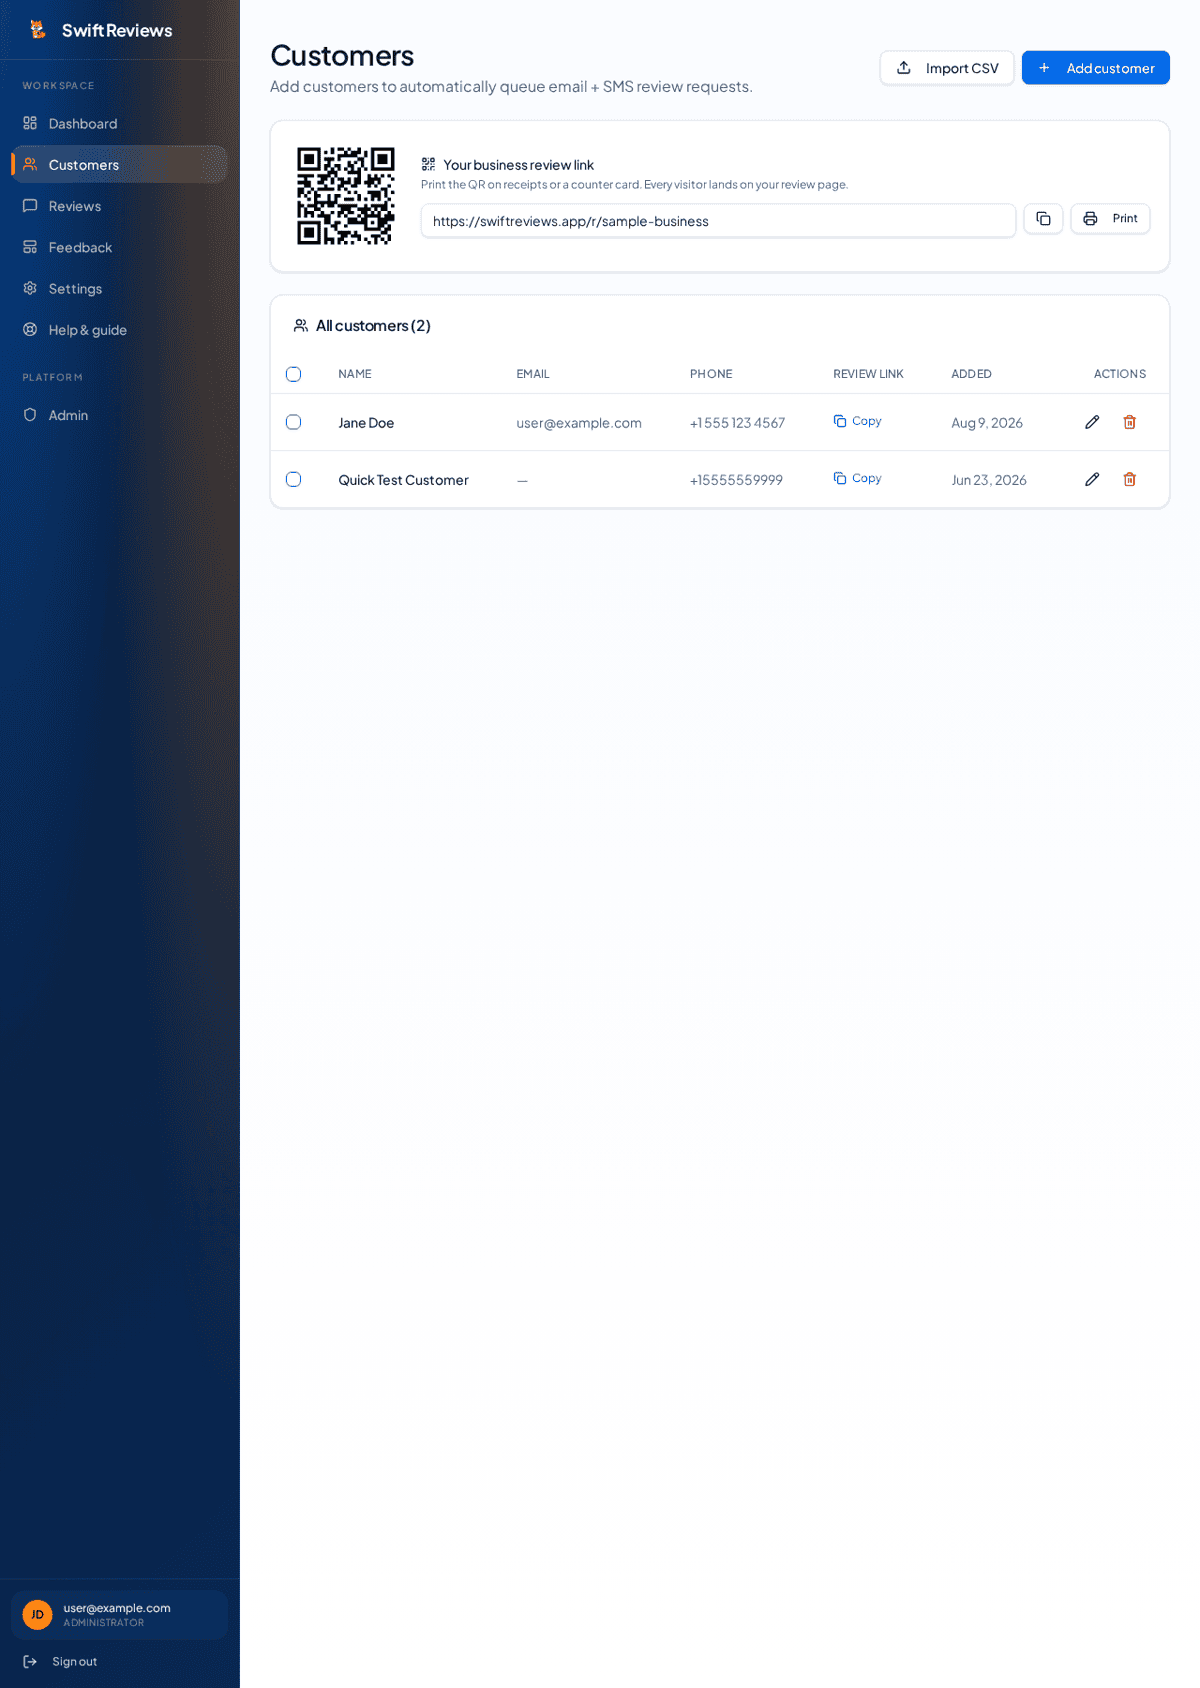
Go to Customers. Add one person at a time with their name and mobile number, or click Import CSV to upload a whole list from your point-of-sale or booking system. The import shows you a preview and flags any bad rows before anything is saved.

  • Use full mobile numbers, e.g. +1 555 123 4567.
  • Duplicates are detected during CSV import.
  • Select several customers to edit or delete them together.
Swift Reviews customers page with the add customer form and customer list

Step 4

Send review requests

Requests send automatically once the delay you set has passed — you don't have to do anything. If you'd rather send straight away, find the customer in the recent requests list on the Dashboard and click Send review request now. A green check means the request already went out.

  • Quick Add on the Dashboard adds a customer and queues their request in one step.
  • Delivery badges show queued, sent, delivered or failed for each text.
Swift Reviews dashboard showing recent review requests with send now buttons

Step 5

Track your results

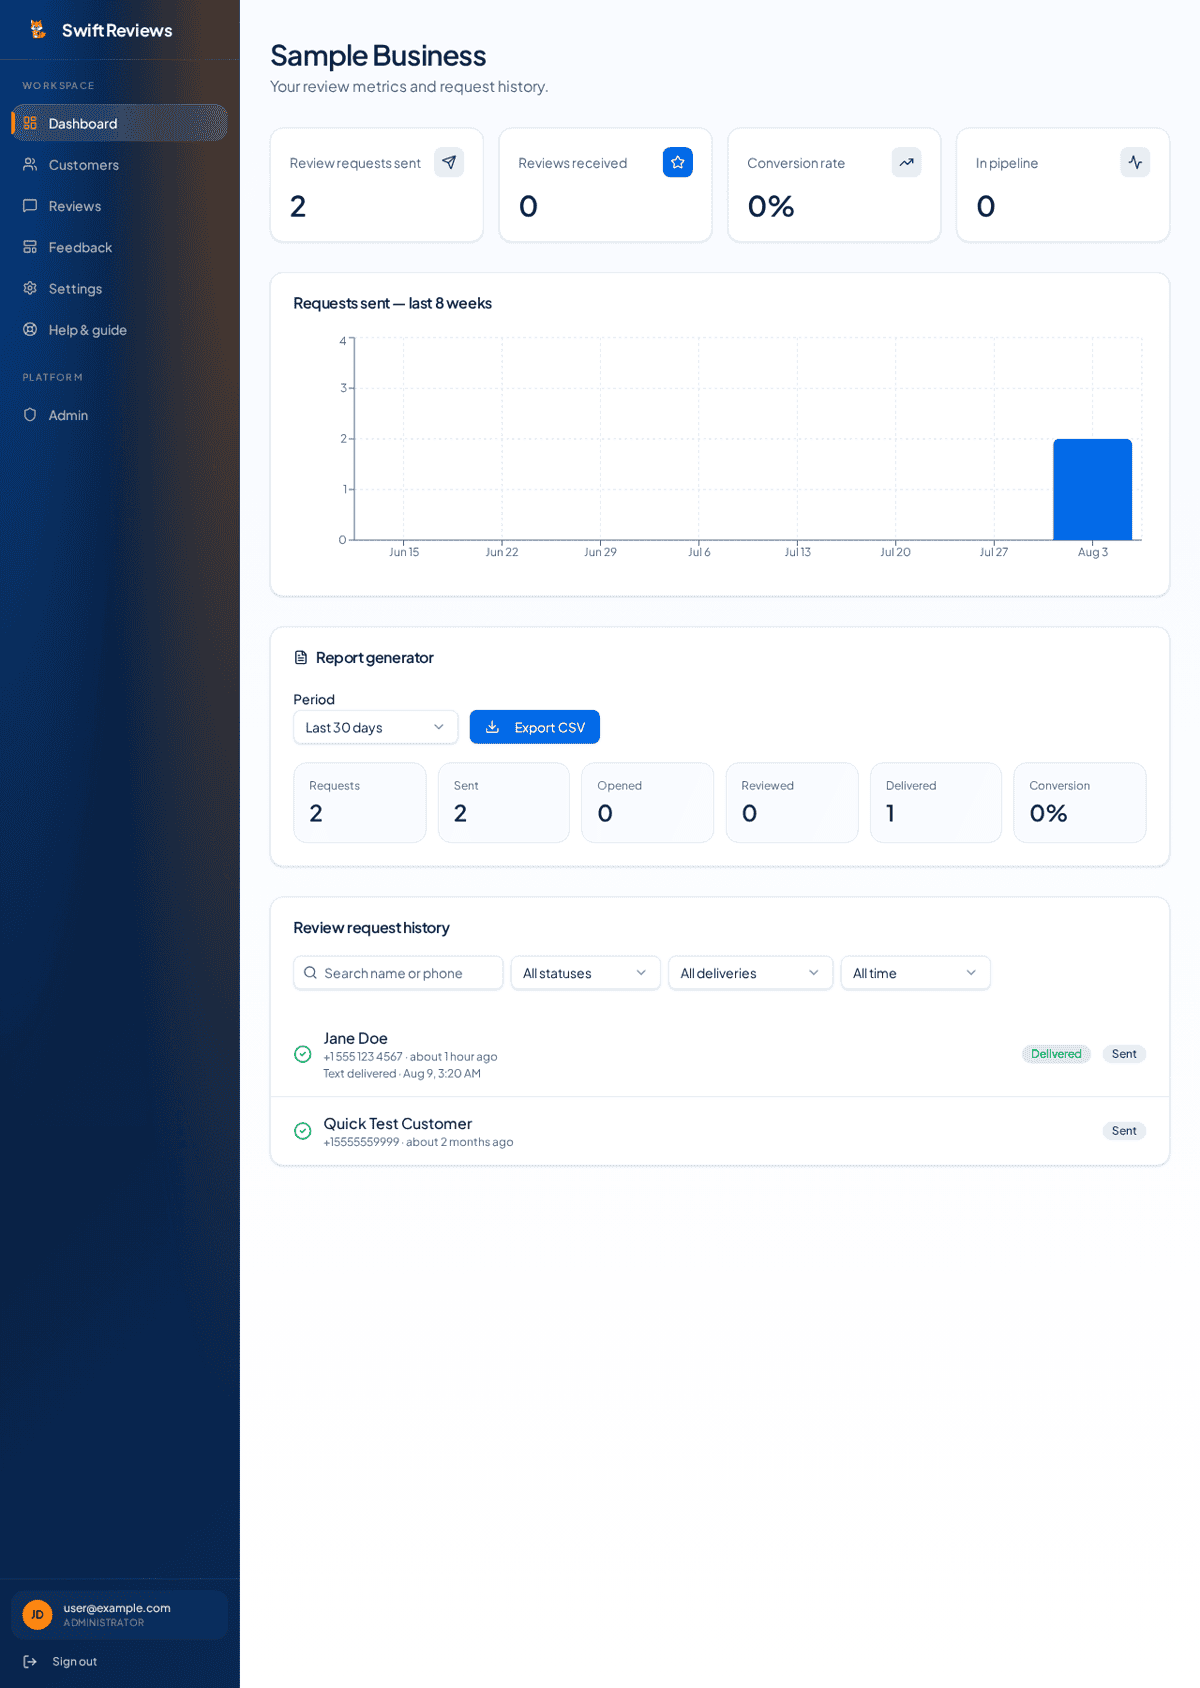
The Dashboard is your scoreboard: total requests sent, reviews received, your conversion rate and a chart of requests sent each week over the last 8 weeks. Update the reviews-received count as new reviews land so your conversion rate stays accurate.

  • Aim for a conversion rate above 20%.
  • The Reviews page keeps the detail behind every request.
Swift Reviews dashboard metrics: requests sent, reviews received, conversion rate and weekly chart

Common questions

Where do I find my Google review link?
In your Google Business Profile, choose "Ask for reviews" and copy the short link Google shows you. Paste that into Settings.
How do I customize the message template?
In Settings, edit the message template and keep the three placeholders — [customer name], [business name] and [google review link]. Swift Reviews fills them in automatically for every request. The live preview shows exactly what each customer receives.
Do customers get a text or an email?
Free accounts send email requests. Pro and Pro+ plans also send SMS text messages, which get the fastest replies.
Can I stop a request that hasn't sent yet?
Yes — delete the customer on the Customers page and any request still waiting is removed with them.
How does the send delay work?
Set the delay in Settings (2 hours by default). After you add a customer, Swift Reviews waits that long, then sends the request automatically.
Can I send a request immediately instead of waiting?
Yes. On the Dashboard, find the customer in the recent requests list and click Send review request now.
A message says failed. What now?
Open the Dashboard, check the delivery badge and error note. Usually the phone number is mistyped or is a landline. Fix the number and send again.
How do I import customers from a CSV file?
On the Customers page, click Import CSV. Match your columns to name and phone number, review the preview, and save. Bad rows are flagged so you can fix them first.

Still stuck?

Send our support team a message and we'll reply by email.

Contact support